Our step-by-step instructions below will show you how to vertically center the data within a selected cell. This can be especially effective when you are working with cells that have a large row height, as vertically centered data can often print better, and can be easier to read.
How to Vertically Center Info in a Cell in Excel 2013
The steps in this tutorial will show you how to vertically align the data in one cell of your spreadsheet. The same method can be applied to multiple cells as well. You can simply select the cells that you want to modify, instead of only selecting an individual cell in step 2 below. Step 1: Open your spreadsheet in Excel 2013. Step 2: Click the cell containing the data that you want to center vertically. As mentioned previously, you can also select multiple cells, if you wish.
Step 3: Click the Home tab at the top of the window.
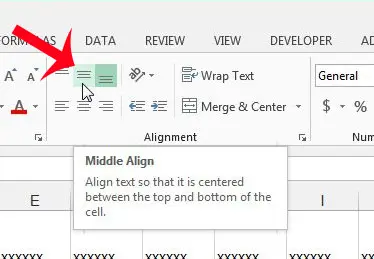
Step 4: Click the Middle Align button in the Alignment section of the navigational ribbon at the top of the window.
Your cell data will now be vertically centered inside of its’ cell. Do you only want to print some of the cells in your worksheet, instead of the entire thing? Learn how to print a selection of cells in Microsoft Excel 2013 and reduce the size of your printed document. After receiving his Bachelor’s and Master’s degrees in Computer Science he spent several years working in IT management for small businesses. However, he now works full time writing content online and creating websites. His main writing topics include iPhones, Microsoft Office, Google Apps, Android, and Photoshop, but he has also written about many other tech topics as well. Read his full bio here.