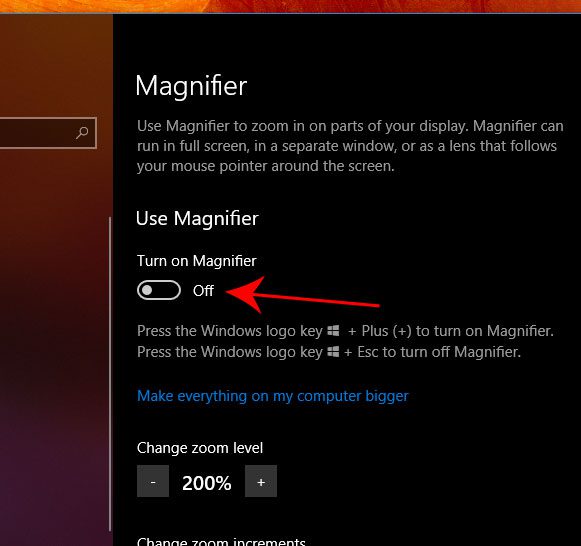
If you’ve never adjust the settings for the magnifier before, then this value is probably set at 200%. This means that everything on the screen will be twice as big, making it much easier to view. Our tutorial below will show you how to enable the Windows 10 magnifier through the Settings menu, then we will tell you the keyboard shortcuts that you can use to enable or disable it a little faster.
How to Enable the Magnifier in Windows 10
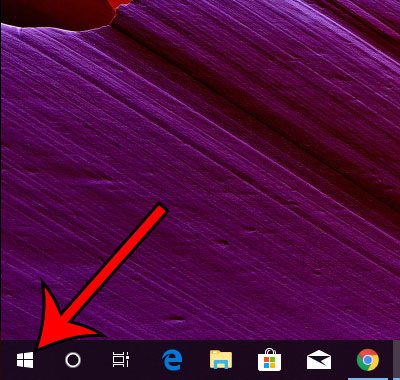
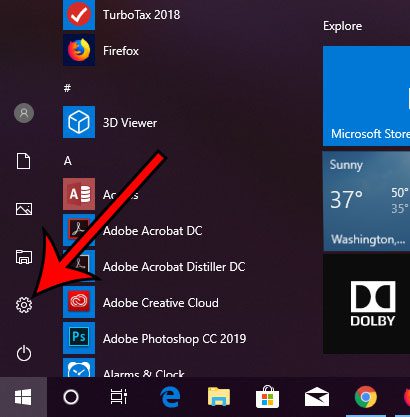
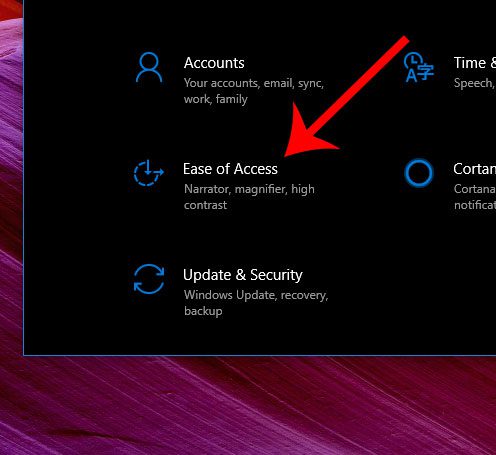
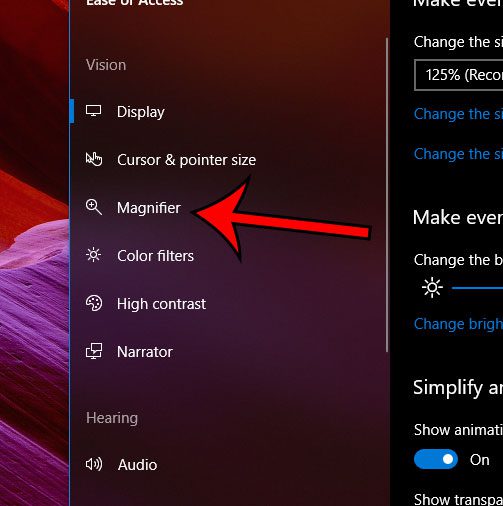
The steps in this article were performed on a Windows 10 laptop. By completing the steps in this guide you will be magnifying your screen. This can make certain screen elements difficult to access. if you are having trouble getting back to the Magnifier menu we are navigating to in the steps below then you can use these keyboard shortcuts to enable or disable the magnifier. Enable the Windows 10 magnifier – Windows key & plus (+) key Disable the Windows 10 magnifier – Windows key & Esc key Step 1: Click the Start button. Step 2: Select the gear icon. Step 3: Click the Ease of Access option. Step 4: Choose the Magnifier tab at the left side of the window. Step 5: Click the button under Turn on Magnifier to enable it. Would you like your Windows 10 menus to have the black background that you see in the steps above? Find out how to enable Windows 10 dark mode and make your screen a little easier to read in low-light environments. After receiving his Bachelor’s and Master’s degrees in Computer Science he spent several years working in IT management for small businesses. However, he now works full time writing content online and creating websites. His main writing topics include iPhones, Microsoft Office, Google Apps, Android, and Photoshop, but he has also written about many other tech topics as well. Read his full bio here.
You may opt out at any time. Read our Privacy Policy
