But you may find that Windows is often selecting a different program than the one you want, or you might simply prefer to select a program yourself. This automatic playing of your media is called AutoPlay, and it’s something that you can turn off. Our tutorial below will show you where to find the AutoPlay setting so that you can disable it for any media that you attach to your computer.
How to Disable the Autoplay Feature in Windows 7
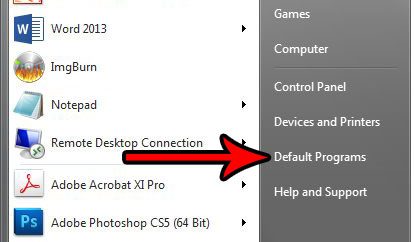
The steps in this article were performed in Windows 7. By completing the steps in this guide you will be changing a setting on your computer so that it no longer autoplays media that you insert into a USB port or your disc drive. Step 1: Click the Start button at the bottom-left corner of the screen.
Step 2: Select the Default Programs option in the right column. If you don’t see that option there, then type “default programs” into the search field and press Enter.
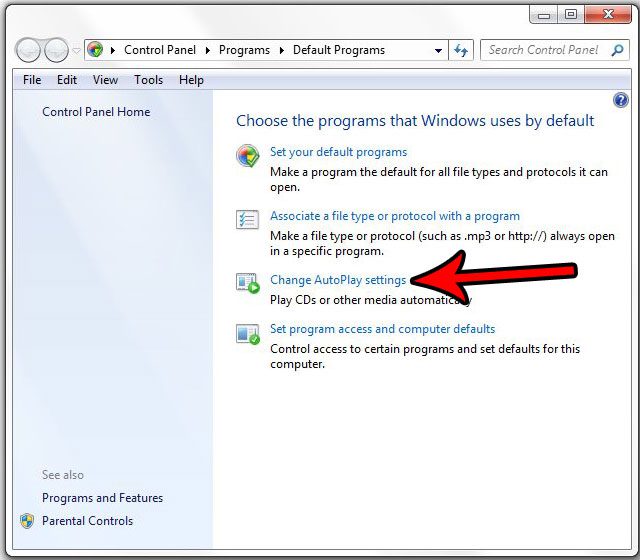
Step 3: Click the Change AutoPlay settings link.
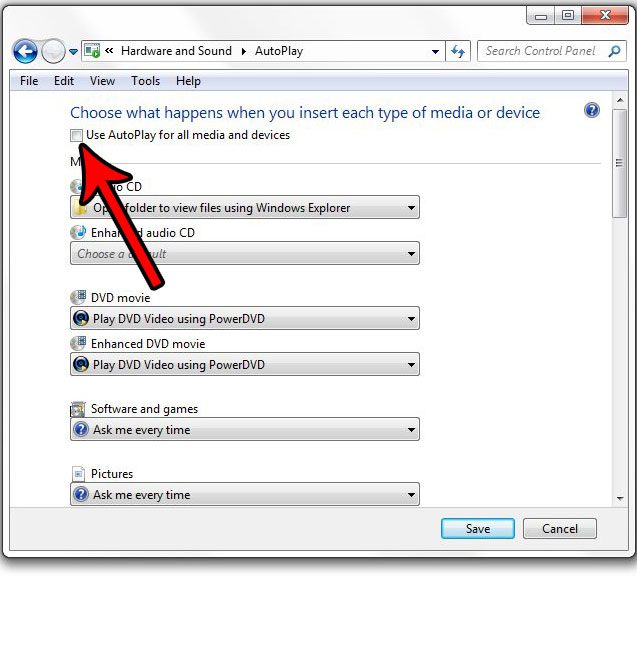
Step 4: Click the box to the left of Use AutoPlay for all media and devices to remove the check mark, then click the Save button at the bottom of the window.
Did all of the icons on your desktop disappear, making it difficult for you to open your files or start your programs? Find out how to make your desktop icons visible again so that you can browse your computer in the manner to which you are accustomed. After receiving his Bachelor’s and Master’s degrees in Computer Science he spent several years working in IT management for small businesses. However, he now works full time writing content online and creating websites. His main writing topics include iPhones, Microsoft Office, Google Apps, Android, and Photoshop, but he has also written about many other tech topics as well. Read his full bio here.
You may opt out at any time. Read our Privacy Policy


