Speed Up Video with Windows Live Movie Maker (WLMM)
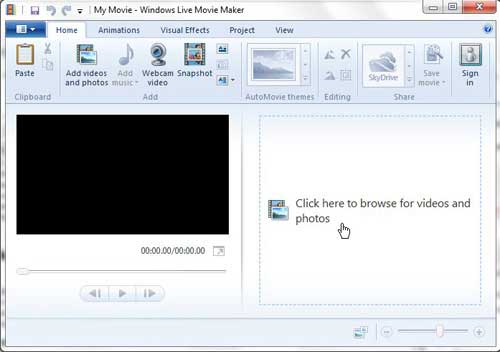
If you have not already done so, you can download Windows Live Movie Maker here. If you run into any problems with the installation, you can follow this tutorial to correctly install Windows Live Movie Maker on your computer. Once the program is set up and you have the video file that you want to speed up, you can follow the instructions below. Step 1: Click the Start button, click All Programs, then click Windows Live Movie Maker to launch the application. Step 2: Click the button at the center of the window that says Click here to browse for videos and photos, then double-click the video file that you want to speed up. Note that you can also right-click a video file, click Open with, then choose Windows Live Movie Maker to open the file.
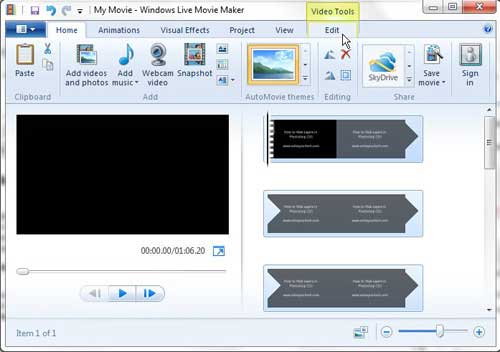
Step 3: Click the Video Tools Edit tab at the top of the window.
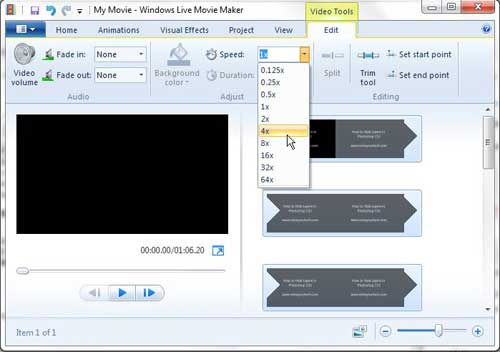
Step 4: Click the drop-down menu to the right of Speed, then choose how much you want to increase the speed of the video.
Speeding up your video will decrease the length of your video. You can see the new length with the changed speed under the preview window at the left side of the window. If you only want to speed up a specific part of your video file, you can follow the instructions at the bottom of this article to learn how to split a video into smaller segments. You can then modify the settings to speed up only that part of the video. After receiving his Bachelor’s and Master’s degrees in Computer Science he spent several years working in IT management for small businesses. However, he now works full time writing content online and creating websites. His main writing topics include iPhones, Microsoft Office, Google Apps, Android, and Photoshop, but he has also written about many other tech topics as well. Read his full bio here.
You may opt out at any time. Read our Privacy Policy


