Color calibration tools and settings have been featured prominently in built-in monitor controls and operating systems to address this problem. Windows has long included a color calibration utility, but oddly, it’s buried in Windows 10. While decreased findability of a feature is usually a sign of impending deprecation, the Windows 10 color calibration utility remains extremely useful for those looking for the most accurate colors possible. This article will show you where to find the color calibration utility in Windows 10 and how to use it.
How to Find and Use the Color Calibration Wizard in Windows 10
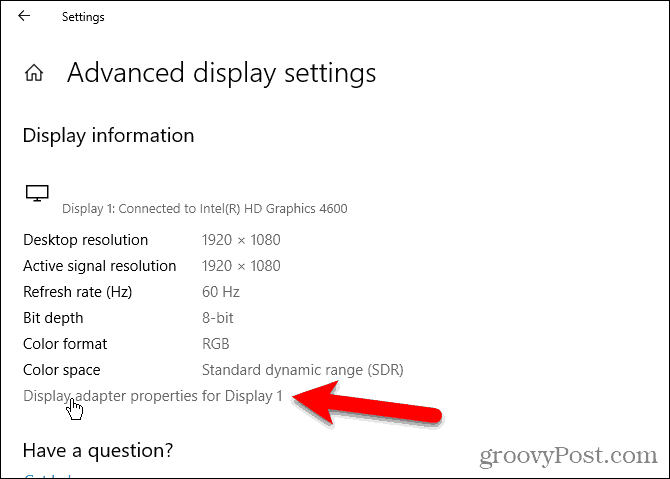
To get started with Windows 10’s built-in color calibration utility, go to Start > PC Settings > System > Display. Scroll down to the Multiple displays section and click Advanced display settings.
On the Advanced display settings screen, click the Display adapter properties for Display 1 link. The number at the end of this link may vary if you have multiple monitors and you’re currently on a monitor that’s not the main one.
Select the Color Management tab, then click Color Management…
Select the Advanced tab, then click Calibrate display.
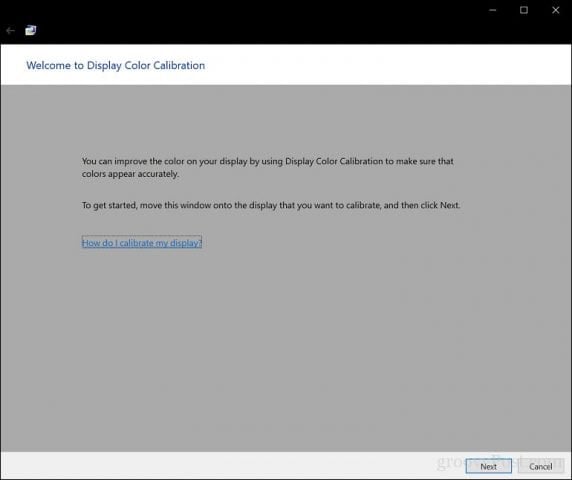
This will start the Display Color Calibration wizard. If you are new to calibrating your monitor’s color, click the link How do I calibrate my display? for more information.
The number of colors your monitor can display depends on several factors, including the graphics adapter, the type of display monitor you are using, and the interface. For modular monitors, it is recommended you use DVI (digital video interface) for guaranteed accuracy. Windows 10’s calibration tools focus on a few areas:
Gamma – how the colors red, green, and blue are projected on the screen to make up the color of an image.Brightness and contrast – how well elements appear in a picture without looking washed out or too dark.Color Balance – how accurately your monitor displays a particular shade of gray.
Accuracy will ultimately be dependent on your own perception. Click Next to begin adjustment.
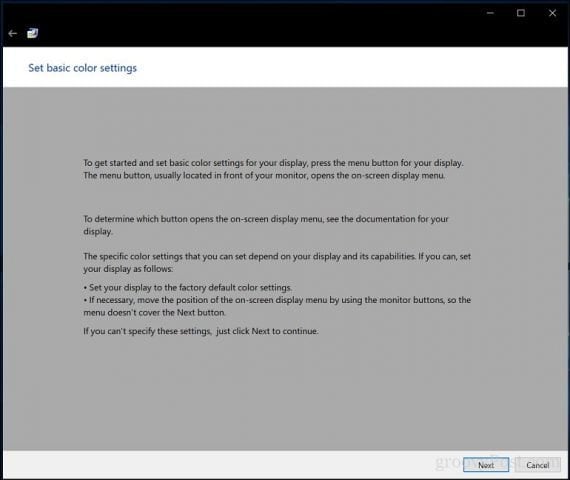
Follow the instructions to reset your monitor’s display color settings before making changes. This can normally be found on the side of your monitor. Click Next.
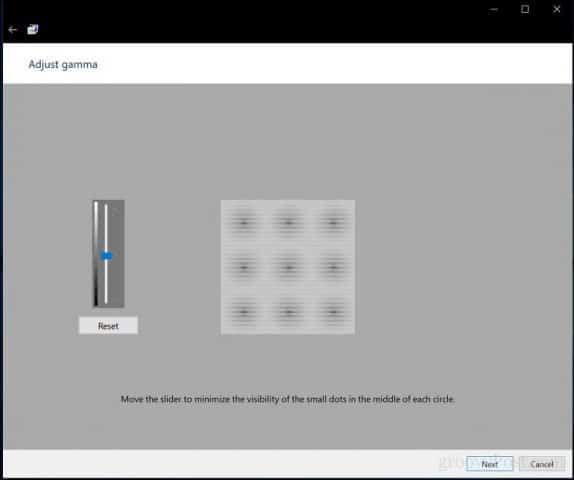
Gamma – Reds, Greens, and Blues
The first modification you will make is to your gamma, which, as we mentioned earlier, determines how colors based on red, green, and blue are displayed on the screen. The example in the screenshot shows what you should try to aim for. Click Next.
Move the slider to reduce the visibility of the faint dots. If you cannot discern a difference between the recommendation on the first page, you can click Next or Reset it, then try again.
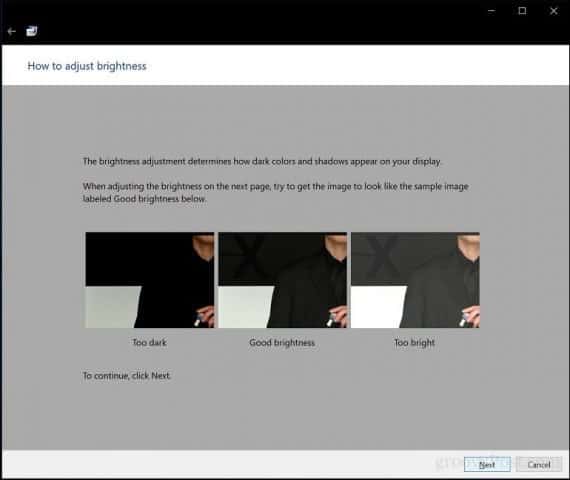
Brightness and Contrast
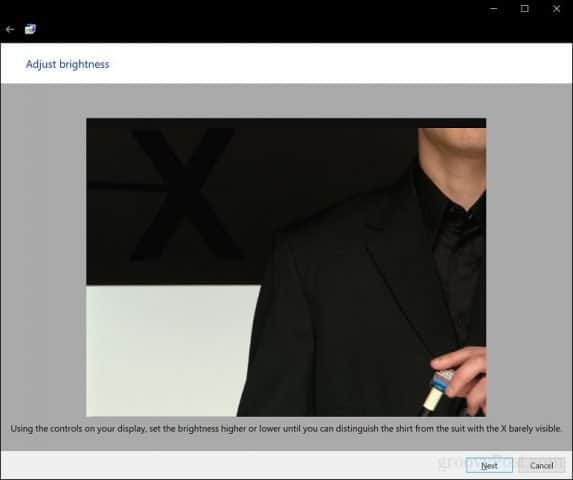
The next two display controls focus on brightness and contrast. For this section of the color calibration wizard, you recommend performing the calibration in an environment with natural light to achieve the best results. If you don’t have an option to adjust brightness, which might be the case if you are using a laptop, you can click Skip brightness and contrast adjustment. Otherwise, click Next.
The wizard provides a sample of what you should try to achieve. Click Next.
Click Next when complete.
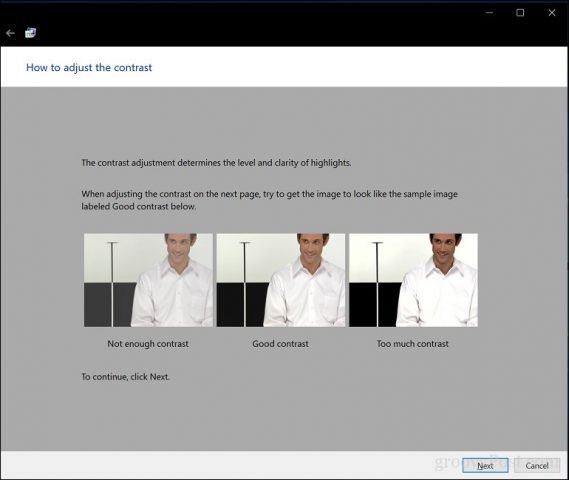
Repeat the same process for contrast using the sample image as a reference.
Click Next when complete.
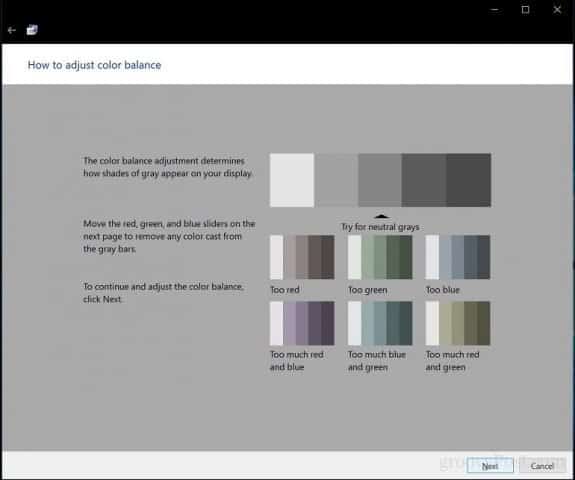
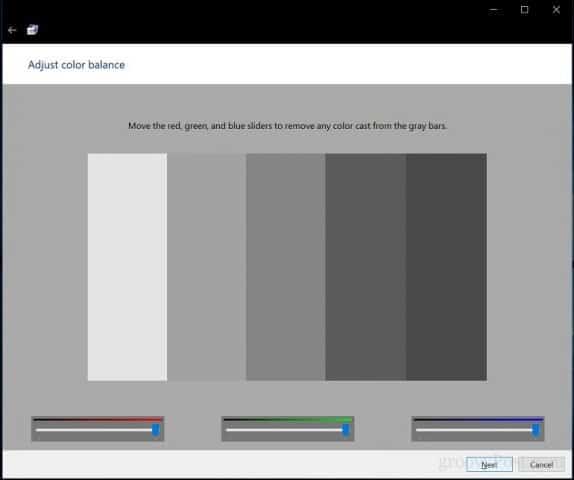
Color Balance
The color calibration wizard also helps you adjust your display’s accuracy when displaying a particular shade of gray. Click Next to begin.
Use the sliders to make appropriate adjustments. Click Next when complete.
After completing the calibration, you can compare your previous settings with the current modifications. Of course, you can always go back and make changes, but if you are happy, click Finish to save the changes or cancel to preserve the previous settings.
There you have it; your display is now set up to produce more accurate output and guaranteed true life results when you print content. The built-in calibration tools might not be professional-grade, but they are a good start and complement to more professional calibrators.
Do you work in an environment where color calibration is important? If so, share your experience with us, along with some tips and tricks. However, this windows tool has existed since at least before Windows 7 – so intel’s reasoning doesn’t make sense. The most stupid thing is that this windows tool DOES NOT WORK. The author of this article probably hasn’t even tried using it because if he did, he would realize that NONE OF THE ADJUSTMENTS ACTUALLY STICK. This built in calibration in windows is totally broken and it’s the reason people use the intel control panel in the first place. Now that intel removed gamma control from their driver there is no way for people to actually make these adjustments. Comment Name * Email *
Δ Save my name and email and send me emails as new comments are made to this post.


![]()
